

Critical systems up and running. Time for a deep clean.
I finished the converter install about three weeks ago, and have been picking away at smaller projects in the Casita ever since. There were a bunch things that needed fixing, and a mysterious smell that we really wanted to solve before we started living on board full time.
First on my list was a new switch for the bathroom fan. Unsure of where to track down the part, I turned again to the Casita Forum. Larry, from Little House Customs told me they had the switch in stock along with a fan handle to replace the one I broke when I took the fan apart. Within a few days I had a switch, handle in hand and ready to install.

The fan repair was followed by a battery cutoff switch, high rise faucet, LED light bulbs and a repair to the freezer door in our Dometic fridge. I was rapidly running down the list of to-do’s but I still had a problem: the stench.
The stench had been there from the beginning. I suspected it had to do with a mouse. When we picked up the trailer in Maine, I spent a half hour with a shop vac sucking up mouse turds from the compartments on the driver side floor. There was a strong urine smell in the forward bench compartment, so I sprayed it down with an enzyme cleaner intended to remove pet smells. I also doused the microwave compartment which had a different, but equally revolting smell.
Suffice to say, I’m not impressed with Nature’s Miracle. It didn’t eliminate the the stink. What’s worse is that the scent of the stuff mingled with the smells I was trying to eliminate to create a truly putrid odor. Even after extended airing out the heavy chemical smell lingered. Fail.

My next attempt at smell control was to scrub out the offending compartments with vinegar and hot water. When I lifted the access cover to the center bench seat I discovered an unpleasant surprise. A mouse house.
Seems the little critter hadn’t just been passing through. He set up shop in the Casita somewhere in Maine and likely spent the winter in comfort. He (she? they?) had a cozy little nest tucked right up on top of the wheel well. Impossible to see until you removed the lid to the cabinet.
The mouse house had to go. I went into sanitize mode and thoroughly scrubbed out everything I could reach inside the cabinet with vinegar and water. Then we opened up the windows and left the Casita in the sun to dry.
That didn’t work.

The floor compartments still smelled like mouse pee. The microwave compartment still smelled like God knows what. The vinegar and water knocked down the Nature’s Miracle smell, but the underlying odors lingered.
Figuring I had nothing to lose, I gave a different enzyme cleaner a try, Earthworm Household Odor Eliminator. This one was advertised as fragrance free. Results were mixed. It certainly didn’t ADD to the odor problems, but it didn’t fix them either.
At this point, it was on to desperate measures. Cristi had long advocated for shampooing all the carpet on the inside of the camper. We were both hopeful that a major deep clean with the Rug Doctor would solve our problems once and for all. So we headed down to Menards and picked up an upholstery machine.
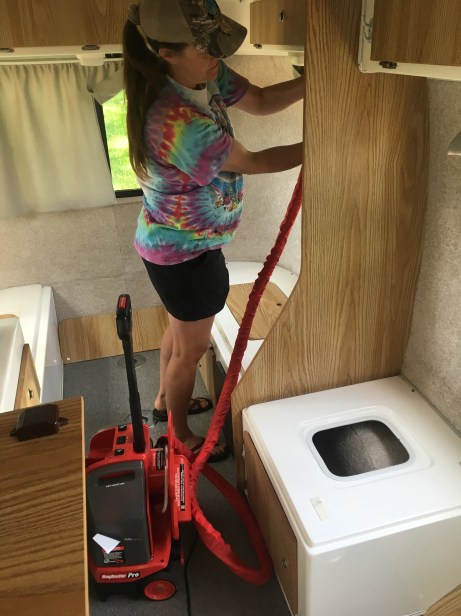
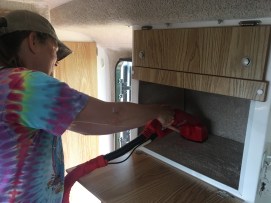
The upholstery cleaner was fantastic. It has a rotating brush and suction head attached to the end of a long hose. The machine is small enough to fit inside the Casita and the hose is plenty long to reach everywhere in the camper, including the ceiling. A couple hours of effort scrubbed away a decade of grime. We weren’t able to clean inside some of the smaller compartments, but we did make a huge improvement in the overall condition of the interior.
Unfortunately, the Rug Doctor didn’t cure the stink. After waiting a couple days to let everything completely dry I went back in and carefully inspected the problem compartments. No luck. Still smelling mousey.
My thoughts now turned to more drastic options. Maybe our best bet was to remove all the carpet from the floor of the camper and replace the floor with vinyl wood planks. We both liked the idea of wood flooring, but neither of us wanted to spend the time and money to rip the guts out of our Casita and replace the floor before we left for the summer.

I decided that I would take an intermediate step. Instead of replacing the whole floor, I would tear out the carpet from the offending storage compartments. If that didn’t do the trick we could escalate things later on.
I had heard that removing the carpet from the floor would be difficult, so I was prepared for a fight, but the whole process turned out to be simple. I removed the cabinets by unscrewing the trim around the base. Then I cut around the inside edge of the cabinet bracing with a fresh utility knife blade. A little prying with a paint tool got the edge of the carpet up so that I could grab it with a pair of pliers. Once I stared pulling the whole works came loose.

With the carpet gone, the smell improved dramatically, but I wasn’t going to take any chances. I painted both compartments with a shellac based primer called BIN. It’s designed to seal in odors. Think the kind of odors you get in a house where there are 25 cats running around after somebody dies. That sort of thing. It’s the nuclear option.

I painted a heavy coat of BIN onto the floor and the cabinet bracing. Then I reinstalled the cabinets and let the primer dry over night. The next day the urine smell was completely gone. We had finally solved the mouse stench problem!

Fixing the mouse smell was a major win, but we still had the microwave cabinet to contend with. We thought it had improved, but now that the urine smell was eliminated the weird odor from the cabinet was hard to ignore. After a couple days of thinking it over, Cristi and I decided to pull the carpet out of the bottom of the cabinet and seal it with primer.


We weren’t sure if we wanted to replace the carpet, so after the primer dried, I cut a piece of minicell foam from an old camping mattress to fit and installed it in the compartment. This covers up the primed OSB and gives a little cushion to anything riding in the cabinet. Then I scrubbed down the carpet on the walls with rubbing alcohol. Most of the odor seemed to be concentrated in the carpet on the base of the compartment, and we didn’t want to pull carpet off the walls if we could avoid it. Hopefully the alcohol would remove any residual odors from the walls.
Today I’m happy to report that the smell problem is cured. Victory at last! With two weeks to go we’re ready to move in and turn our tiny house into a home.

Here’s are a few more images of projects that we’ve completed over the past few weeks. Liftoff is only a couple weeks away and it looks like we’ll be road ready just in time.


Here’s the list of projects completed to date:
- Flush grey water tank
- Sanitize fresh water system
- Clean water pump
- Replace water heater anode
- Replace water heater cutoff valve
- Replace battery
- Patch small hole behind passenger side wheel well
- Repair/replace interior cabinet latches
- Replace trim inside of door
- Rust bust frame and paint with Rustoleum
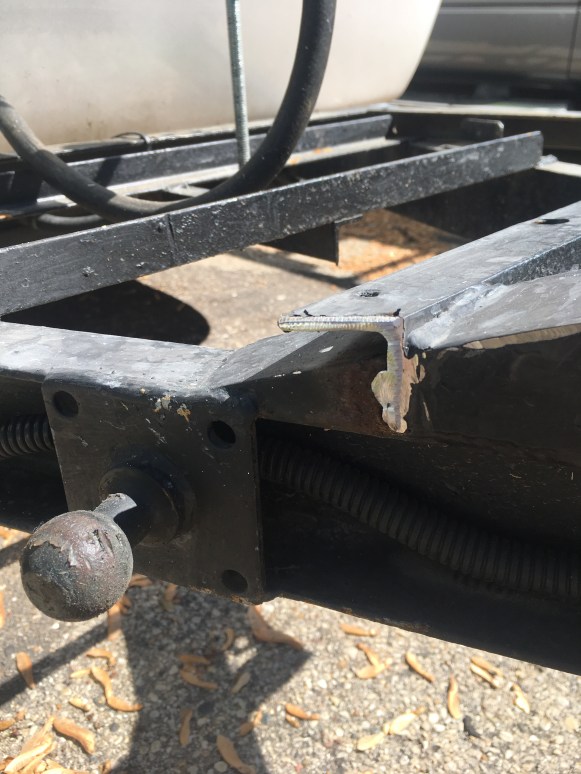
- Pound bumper back to square and install new end cap
- Remove aftermarket leveling jacks
- Fix hinges on stove cover
- Clean refrigerator components
- Clean/bleach bathroom
- Buff exterior gel coat
- Install Maxxair roof vent cover
- Install sway bar
- Tighten connections in converter box
- Replace flush valve on toilet
- Replace screen door latch
- Install new propane tank cover
- Install battery cuttoff switch
- Install new converter
- Replace lav fan switch and handle
- Install spice racks
- Scrub compartments with vinegar
- Install high rise faucet
- Fix freezer door
- Install LED bulbs in all fixtures
- Shampoo all carpet
- Remove carpet from floor compartments. Painted with BIN primer
- Remove carpet from base of microwave compartment. Painted with BIN primer
- Install minicell pad in microwave compartment
- Install spare tire bike rack
If you enjoyed this post, please consider subscribing by clicking one of the links in the menu at the right side of the screen. If you’re viewing on a mobile device you’ll find the links if you scroll to the bottom of the page. Thank you for reading.

You pick the right primer for the smell…..I’m a professional painter of 45 years and it was the only product that would seal smoke smells ….good job all the way around…..
Thanks Dan. Sure am glad I found the BIN!
The nuclear option! Way to go, Brian. I can’t wait to see your posts once you hit the road.