

A quick and easy way to improve the comfort and fit of your canoe seat.
The last article I posted detailed the history of Wenonah Canoes and the reasons that Wenonah offers bucket seats as standard equipment in many of their models. Through the years I’ve met a few people who claim that they find bucket seats uncomfortable. Most of the time this is because they’ve never tried a properly padded bucket.
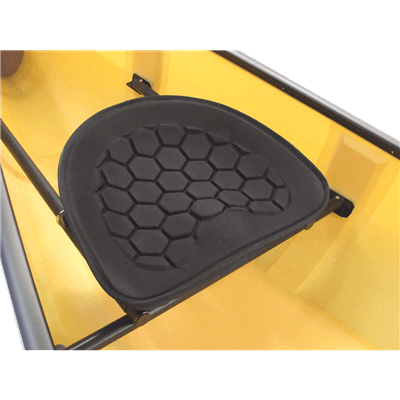
A padded a bucket seat is comfortable, offers excellent connection to the boat and is quick to dry. It’s my favorite seating option in a canoe and one I find much more comfortable than standard web or cane seats.
Padding a bucket seat is simple and inexpensive. It requires a closed-cell camping pad, some spray adhesive and a utility knife with a fresh blade. Here are a few images that walk you through the process.
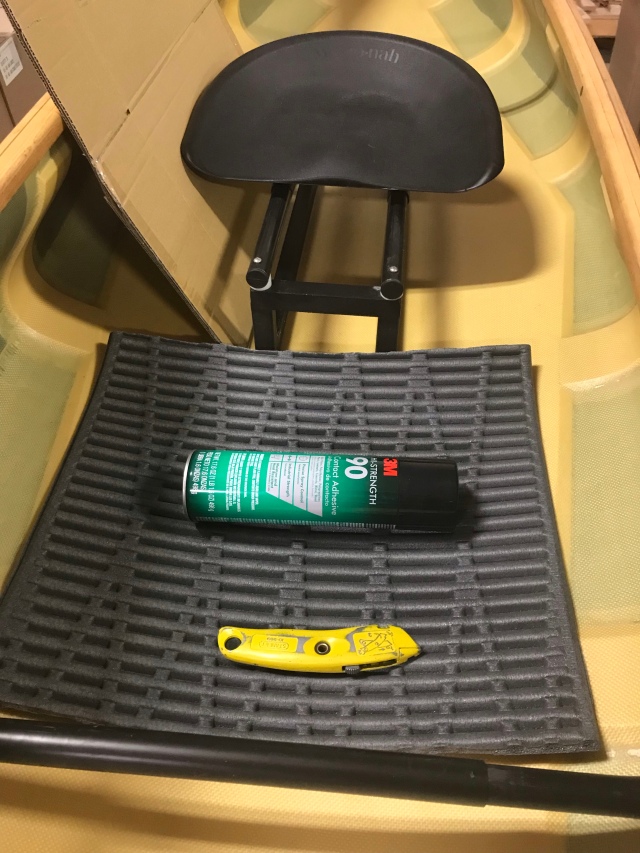
Step 1: Cut the Foam
Cut a section out of the camping pad that’s a little larger than the seat.
I like to use a Thermarest RidgeRest pad rather than flat, closed cell foam. The contoured ridges give the pad more thickness for comfort and seem to hold less water next to your backside than a flat pad does. If you can’t find a RidgeRest any closed cell camping mattress will work.
Make sure you cut the foam a few inches larger than the seat itself. When you press the pad to the seat you’ll need the extra foam to match the contours of the bucket, and you’ll want to have a little foam hanging off the edge of the seat when you’re finished.
Step 2: Apply Adhesive
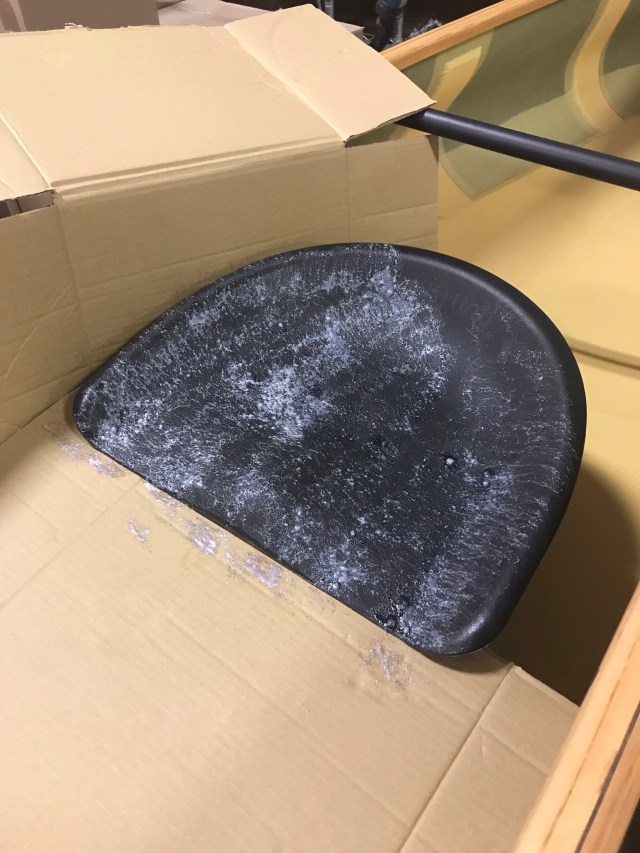
Spray the underside of the foam and the top of the seat pan with adhesive. Use a piece of cardboard to catch any overspray around the seat.
I like to use 3M Hi-Strength 90 but any strong spray contact adhesive will work. You can even paint on a contact adhesive like DAP Weld Wood. Weld Wood probably provides the strongest bond, but spray adhesives are easiest to use.
Spray one coat of adhesive onto both surfaces. Allow to dry before spraying a second coat. Two thin coats are better than a single heavy coat.
You want your second coat to be slightly tacky when you apply the foam to the seat. If it’s too dry it won’t stick. You’ll know. If this happens you can use a hair drier or heat gun to warm the adhesive and reactivate it. Or just spray on a third coat and wait for it to tack up.

Step 3: Apply the Foam
When your second coat of adhesive is dried, its time to stick the pad to the seat. Line up the front edge of the foam with the front edge of the seat so that it overhangs slightly. Carefully press the foam down to the seat, starting at the front edge and then working from the center out. Try to keep the rear edges from sticking before the center. If they do, it’s not a big deal, the foam will stretch to conform to the seat.

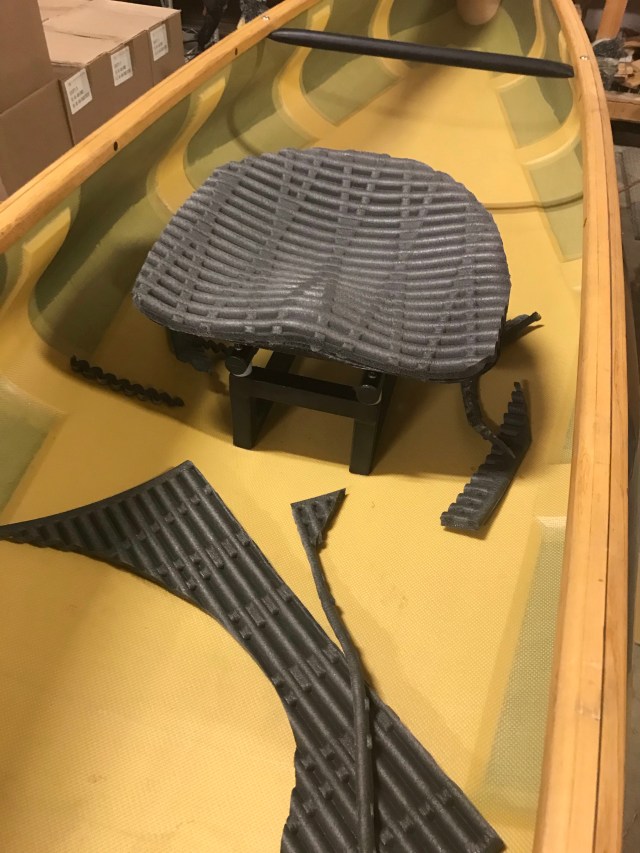
Step 4: Trim the Seat Pad
Once the foam is completely adhered to the seat you can make the final trim. Use a new blade in your utility knife to avoid a ragged edge. Hold the blade vertically and begin trimming the foam, using the edge of the seat as a guide. You can hold the flat edge of the blade against the edge of the seat and the blade will slice the foam without cutting the seat. If you’re careful you can make this cut using just the blade itself rather than the knife. This sometimes gives cleaner results.
It’s helpful to remove most of the foam first in large sections, leaving a thin radius of foam around the seat that can be trimmed a second time to perfectly match the seat pan.

Once you’ve trimmed around the pad you can use your hair dryer or heat gun to reheat the adhesive around the perimeter of the seat. Then you can stick the very edge of the foam down firmly to the seat.
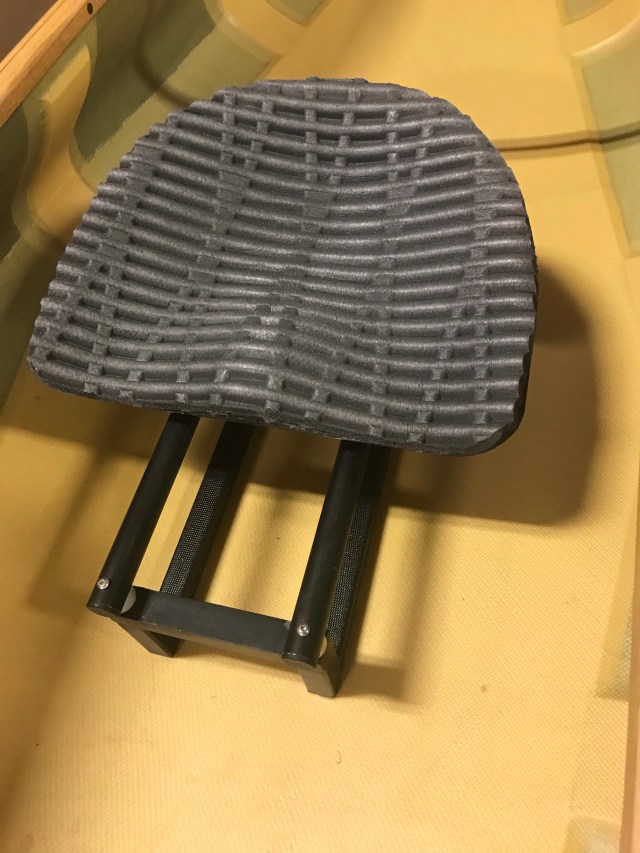
That’s the complete process. Start to finish it doesn’t take much more than a half hour and you’ll use less than $50 worth of materials. Padding a seat this way gives you great connection to the canoe and excellent comfort. If you haven’t paddled your bucket seats yet it’s well worth the cost and effort.
Of course, DIY projects aren’t everyone’s cup of tea. And you might be a little uneasy spraying glue on your brand new Wenonah canoe. If you’d rather not mess with contact adhesive and trimming you’ll find a simple solution to bucket seat paddling on Wenonah’s website here:
If you enjoyed this post, please share it on your favorite social media site using one of the buttons below. If you want to see more, consider subscribing to our website by using one of the links in the menu on the right side of the screen. If you’re on a mobile device you’ll find the Follow button if you scroll down from here. Thanks!

Prism?
This one was an Advantage. Current solo fleet is an Advantage and a ragged out old Encounter.