
It’s hard to find a decent synthetic sleeping bag these days.
[UPDATED]
I’m sure my friends in the Outdoor Industry will disagree vehemently with this statement. After all, there are hundreds of different synthetic sleeping bags available in today’s specialty outdoor market. Surely some of them must be excellent, right?
Let me explain.
A couple years ago I wrote a post about high-loft insulating layers. High-loft layers form the final cold weather layer in my proposed Simple Clothing System. In that piece I explored the pros and cons of down and synthetic insulations, including modern, water resistant down and both short staple and continuous filament synthetics. I explained why I consider synthetic materials superior to down for extended field use, primarily because of their ability to maintain loft and warmth over time in cold/wet environments. If you’re interested in that discussion you will find the post here.
Researching this piece I couldn’t really determine much about the wide range of proprietary synthetic insulations on offer from sleeping bag manufacturers today. Each company now seems to have its own insulation. None of them go into great detail to explain how the insulations are designed and manufactured. All you get on the websites is marketing jargon.
Now, there’s a good chance that much of this insulation is the same stuff from the same mill, just branded differently for each company. That happens a lot. But this doesn’t help when you’re trying to determine which insulation is going to perform best for your needs.
Not only is it difficult to figure out what these insulations are made of, it’s virtually impossible to find any real world discussion of long term durability. Most of them tout how light and compressible they are. Not how tough.
For years, the Holy Grail of synthetic insulations has been to replicate the weight, loft and compressibility of down. There’s been a lot of innovation in this quest over the past decade or so.
I’m more concerned about durability.
Synthetic insulations are bulkier and heavier than down. They’re also not nearly as durable. For example, I have a Feathered Friends Widgeon down bag from the early 1990’s that still has all it’s original loft. By comparison, my synthetic bag from the early 2000’s has lost at least half of its original insulating value. This is what I see as the main drawback of synthetics. They don’t hold up as well as down.
Given this fact, durability seems like the most important factor in which synthetic insulation to choose. There are plenty of light and compressible insulations out there, but which of these will maintain loft best over time?
Back in the 1990’s and 2000’s there was an easy answer to this question: Polarguard.
Polarguard
Much of the durability of Polarguard had to do with the fact that it was a continuous filament insulation. Instead of short fibers, bonded together, Polarguard used a continuous filament of insulation woven into bats of various thickness. These were more stable than short fiber alternatives like Primaloft.
Back in those days, there were a few manufacturers who flirted with other materials like Qualofill or Primaloft, but these never provided satisfactory loft or durability. Then there was the disastrous industry-wide experimentation with Thinsulate Lite Loft. Lite Loft bags were initially puffy and compressible, but rapidly lost loft with use. Within a few years they were reduced to a couple layers of taffeta. Polarguard was the only fill that did a decent job of maintaining loft over time.
The only major outdoor company that refused to jump on the Lite Loft bandwagon at the time was The North Face. We all thought they were making a big mistake trying to sell bulkier Polarguard Cat’s Meows against Moonstone and Sierra Designs Lite Loft bags that went into the stuff sack like 550 fill down bags.
Guess we were wrong and TNF was right.
You can’t buy a Polarguard sleeping bag anymore. The Polarguard brand name is lost to history due to a series of acquisitions and bankruptcies that began in the late 1990’s. Link.
The current version of “Polarguard” is produced by a company called Harvest Consumer Insulation. Harvest manufactures a continuous filament insulation called Climashield Apex that is similar to, if not superior to Polarguard in terms of performance and durability. As far as I can tell from my research, Climashield is Polarguard in everything but name.
[This might be a good time to mention Wiggy’s sleeping bags. Wiggy’s is one of the few sleeping bag manufacturers sewing bags in the US. They use a fill they call Lamilite, which is a proprietary insulation made by laminating a layer of Climashield between two fabric scrims (previous versions of Lamilite used Polarguard). The scrims further stabilize the continuous filament fibers resulting in an insulation that is more durable, but also heavier and bulkier than standard Climashield. Wiggy’s bags have a loyal following among serious outdoor users who are willing to trade a little more weight and bulk for increased durability in a synthetic bag. I’ve been tempted to try these bags through the years and may do so in the future.]
OK, so Climashield is the new Polarguard.
This spring I started looking for a sleeping bag to replace my ancient Kelty Polarguard bag. What I discovered was that, with the exception of Wiggy’s and some small specialty manufacturers, no company was using Climashield to sew bags.
Why? As far as I can tell it has to do production and supply chains. Most manufacturers are sewing synthetic sleeping bags in Asia. Climashield is produced in the US. So a manufacturer who wants to use it would either need to start sewing bags in the US, which would be expensive, or arrange to ship Climashield to their factories overseas to then be shipped back to the US, which would be expensive.
As I said, I’ve been tempted by the Wiggy’s bags in the past. And I gave ordering one some serious thought. But in the end I decided that I was interested in something lighter. Eventually my Climashield search landed me on the websites of small, specialty manufacturers of ultralight backpacking quilts.
Quilts
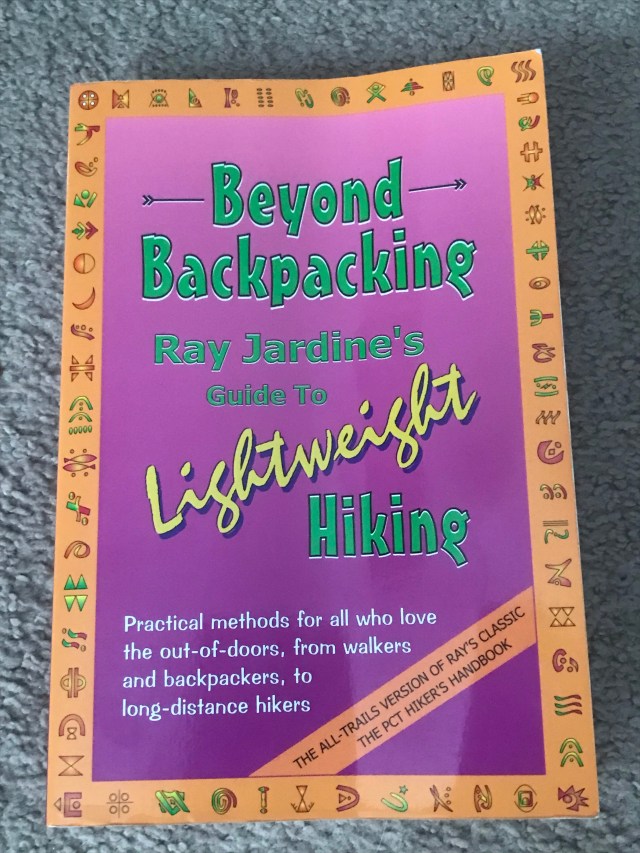
My first introduction to ultralight synthetic quilts was in Ray Jardine’s book, Beyond Backpacking. Quilts are a part of Jardines’ ultralight backpacking system which also includes sil-nylon tarps and minimalist backpacks. His bonafides are pretty serious. The guy has thru hiked the PCT, CDT and AT. Multiple times. With a base pack weight under 10 pounds.
When Beyond Backpacking was published in 1999 it was radical. When I worked at Life Tools in the ’90s we commonly sold expedition size backpacks in the 5,000-6,000 cubic inch range. These packs weighed 5 pounds or more. Three-season synthetic bags weighed a little over three pounds. A light tent was 5 pounds. Jardine cut these weights to about a pound each with his ultralight approach. People through he was crazy.
Fast forward thirty years and many of Jardine’s innovations have slowly worked their way into the mainstream. Especially among long distance hikers. Tarps are commonplace, packs are smaller and much lighter, and lots of thru-hikers have adopted quilts in place of sleeping bags.
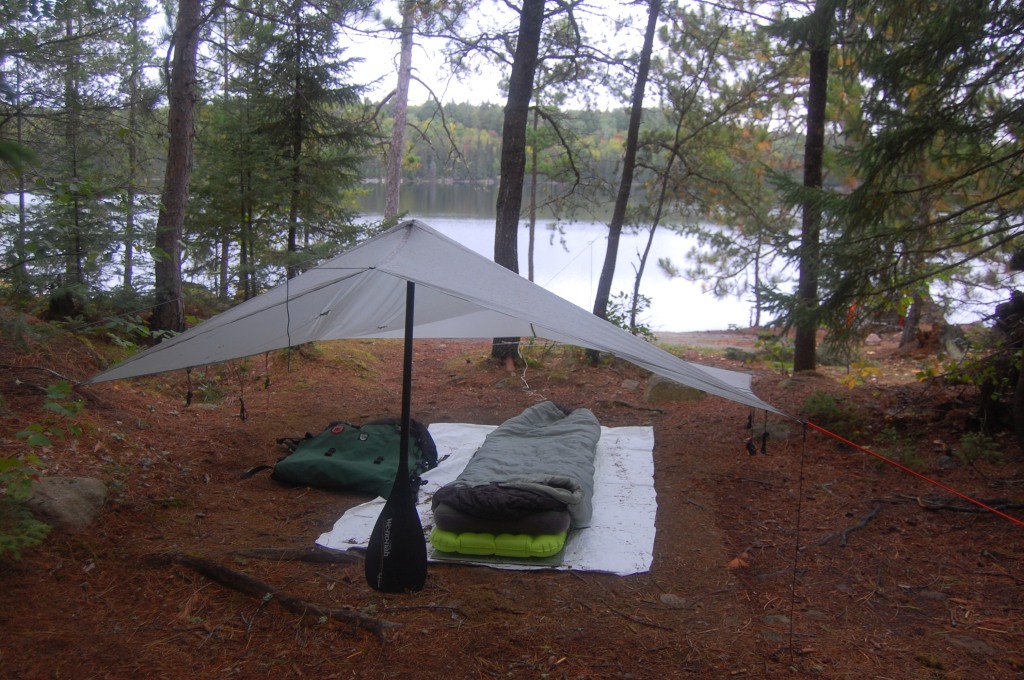
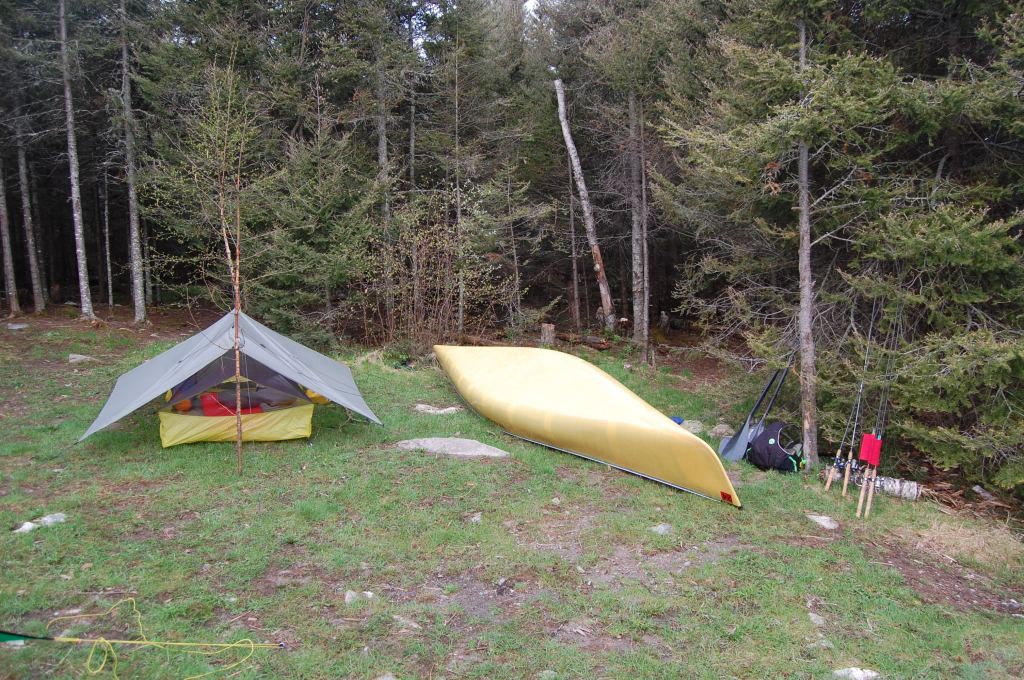
I’ve played around with various components of “The Ray Way” for the past couple decades. The ultralight tarp in the image at the top of this post was sewn off one of Jardine’s patterns, most of my backpacking over the past decade has been with a minimalist pack, and my 80 percent packout has gotten pretty light.
I haven’t tried a quilt yet.
No better time than the present.

MYOG
As I began to research quilts, I came across a number of small companies producing custom quilts in both Climashield and down. One of them, Enlightened Equipment, is not far from my house here in Winona. Small world.
I also came across a lot of resources for Making Your Own Gear. My favorite YouTube MYOG quilt video is the one embedded below from Backcountry Banter. Joe Brewer does an outstanding job of walking you through the complete project from designing the quilt through selecting and sourcing materials. If you’re interested in sewing a quilt, you’ll definitely want to watch his video a few times.
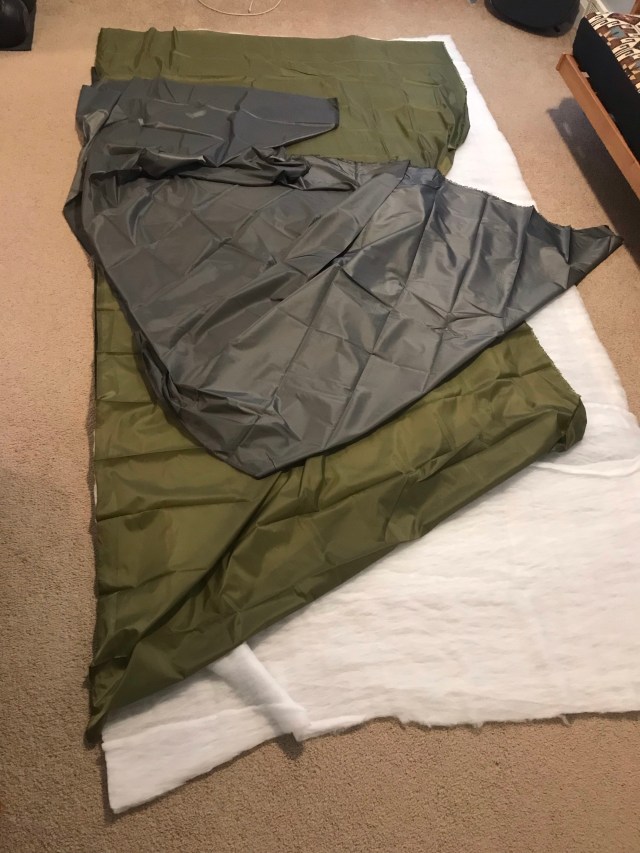
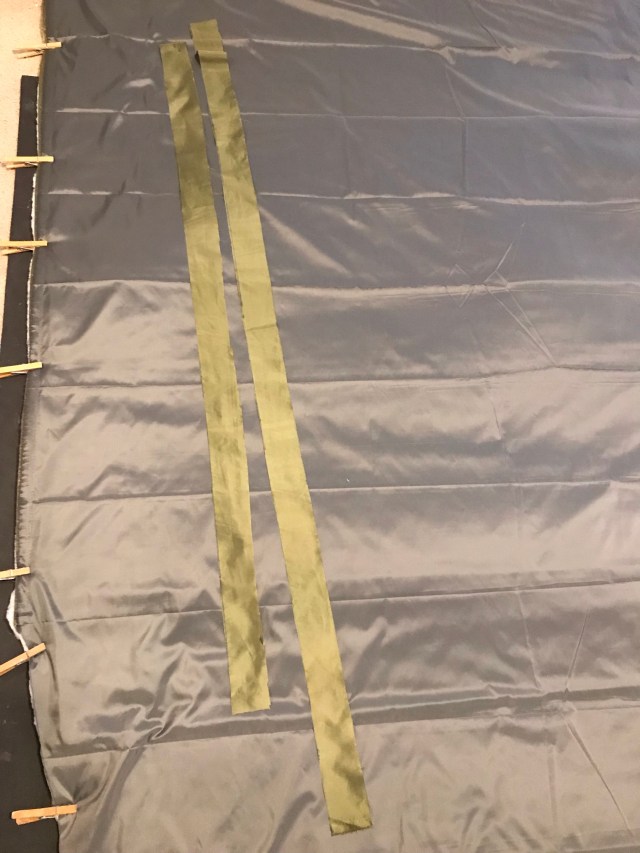
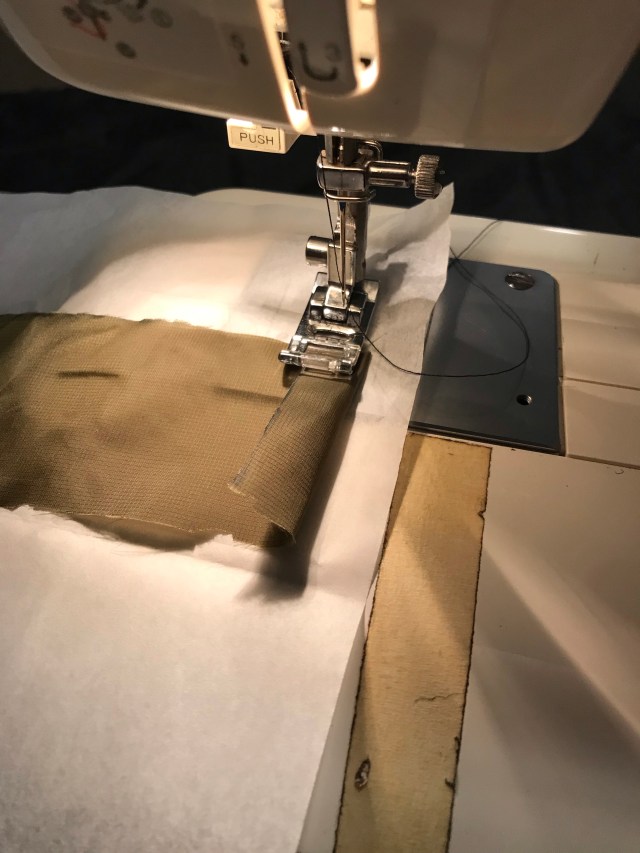
The following images are a step-by-step walk through the process along with a few tips I picked up along the way.


Ultralight Is Right
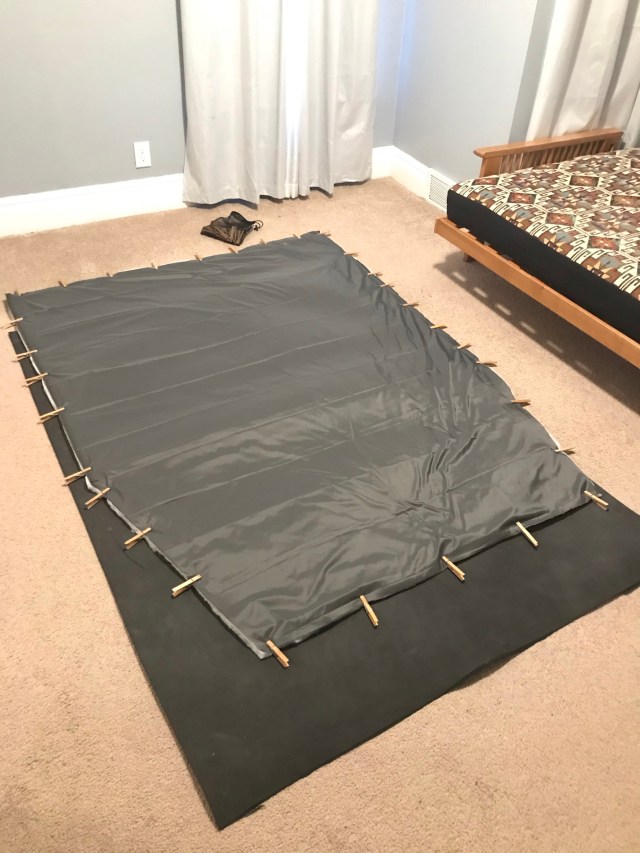
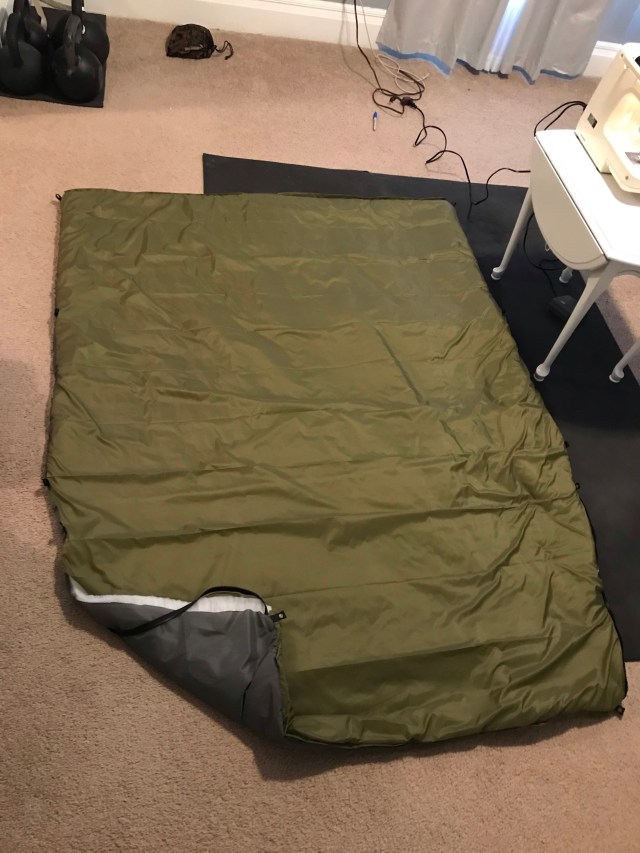
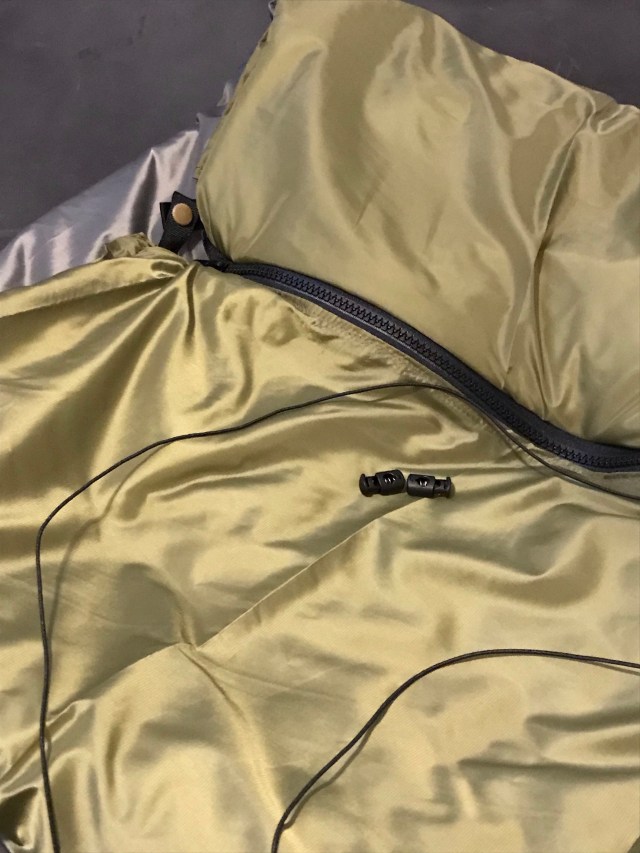
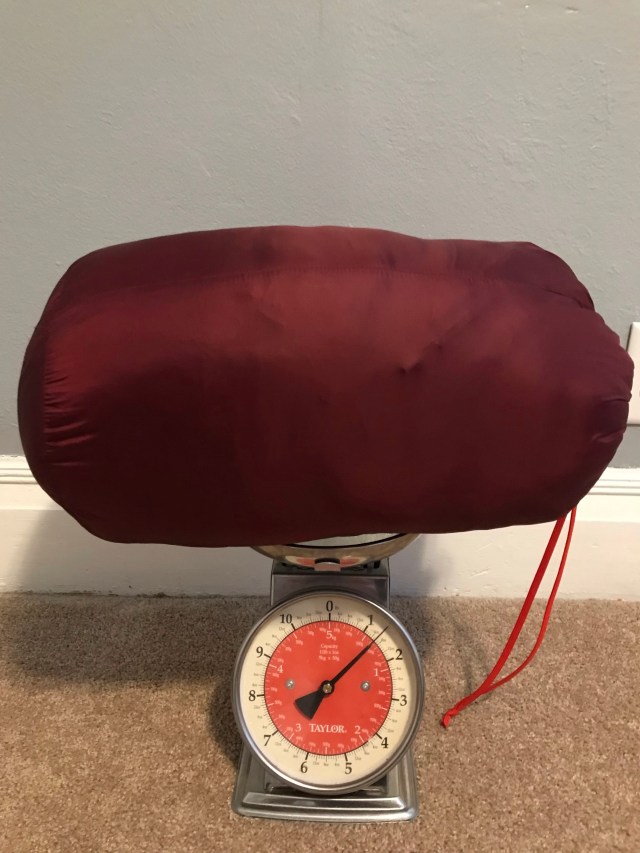
The finished quilt weighs in at about 20 ounces. About half the weight of a three season synthetic bag and on par with the lightest down summer bags. It’s roomy enough that I’ll be able to layer clothing to push my comfort level lower on cold spring and fall nights. In the summer it will be cooler than my old Polarguard bag.
Given the success with this quilt I’m tempted to sew another one with 5 ounce Apex to see how cold I can push it in the early spring and late fall.
Costs for this project are modest. The fabric and insulation came in about about $65. All-in costs including the snap tool and notions was around $100. That’s about half the price of a commercially sewn quilt.
If you’re thinking of trying a quilt to lighten up your backcountry load, and you are at all handy with a sewing machine, you should definitely give this project a try. It’s a low cost way to experiment with new gear and a great way to get a truly custom sleeping bag that’s lighter than bags that cost two or three times as much.
[UPDATE: Just back from a quick fishing trip to the Boundary Waters where I put the new quilt to the test. With clothing it kept me warm down into the mid-30’s. As far as I’m concerned, I’ve found my new three-season sleeping bag.]
Lessons Learned
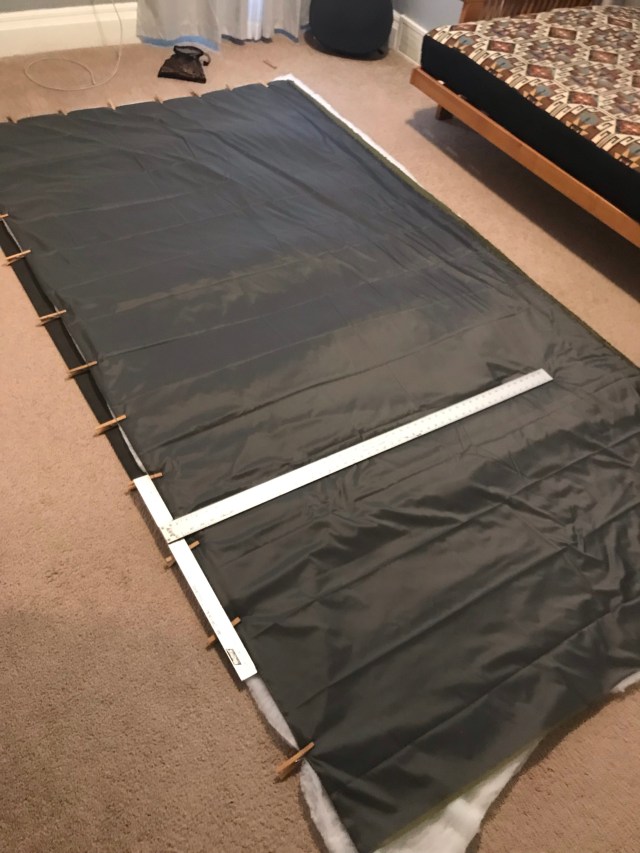
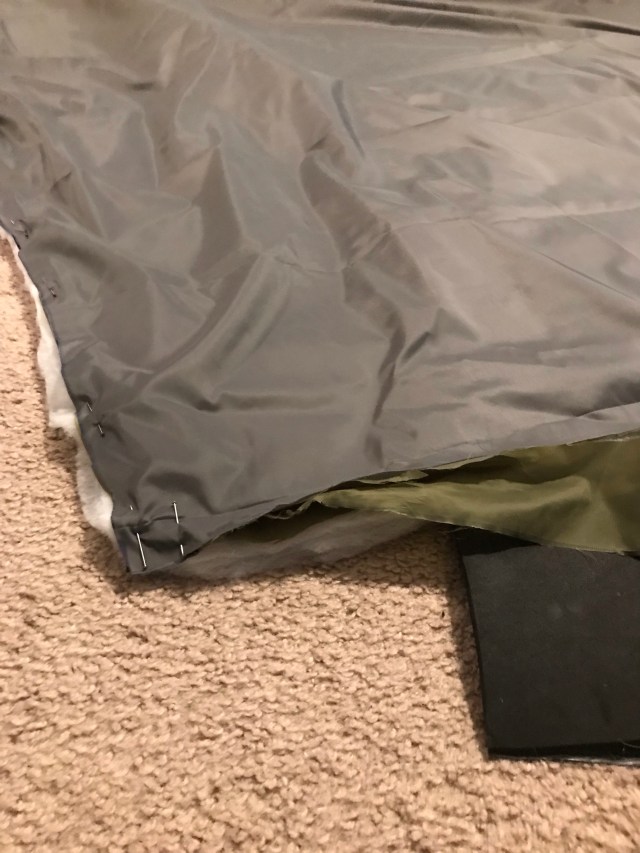
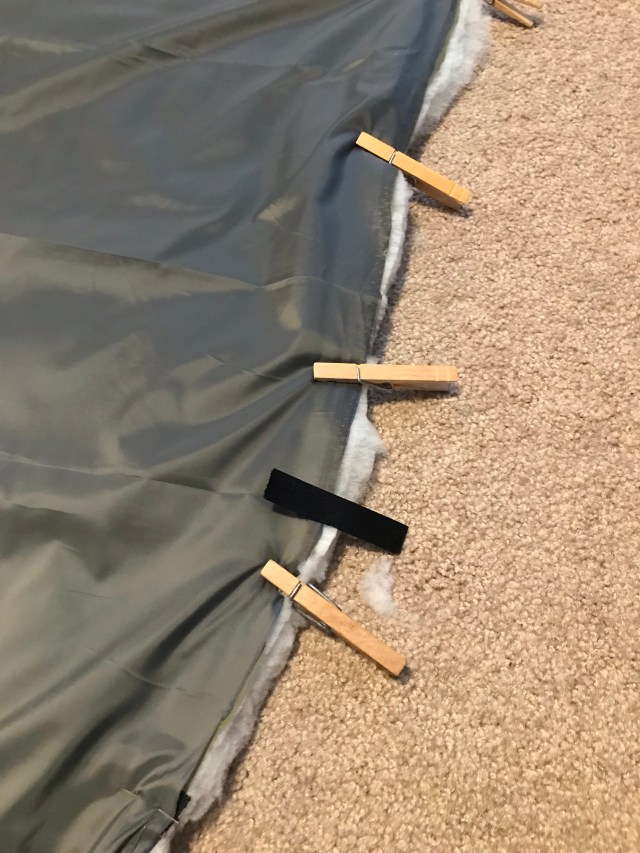
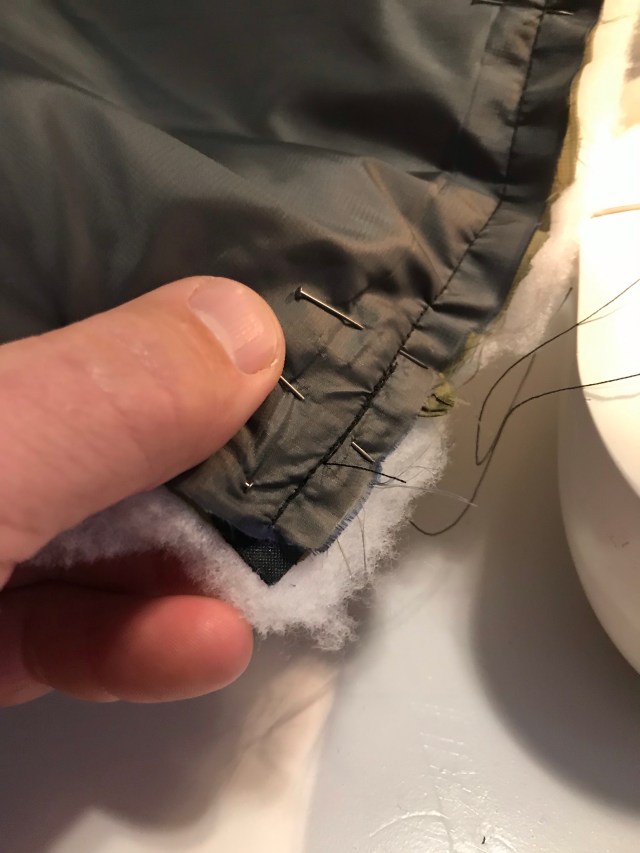
Overall this project turned out really well. It was about 80 percent prep and 20 percent sewing. Once you have everything laid out and pinned in place things go very quickly.
I did learn a few lessons along the way. Here are the big ones:
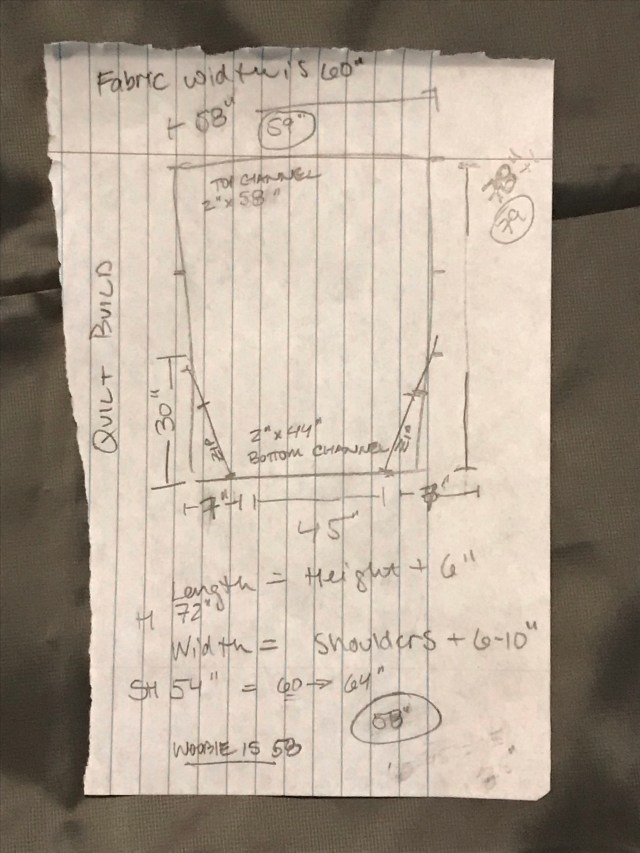
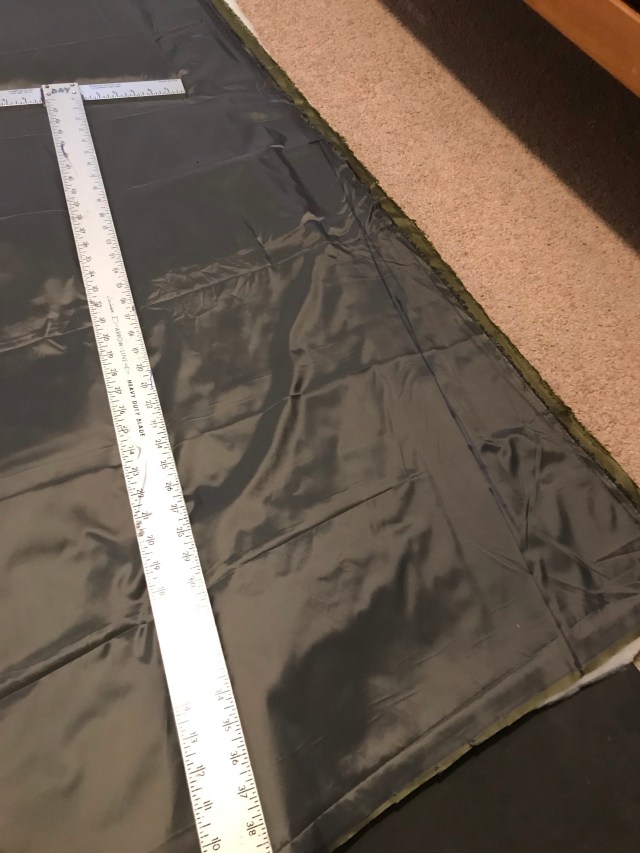
- Pay careful attention to sizing. This quilt fits me precisely. For my next quilt I will probably add 12″ to my height to allow for a little more length.
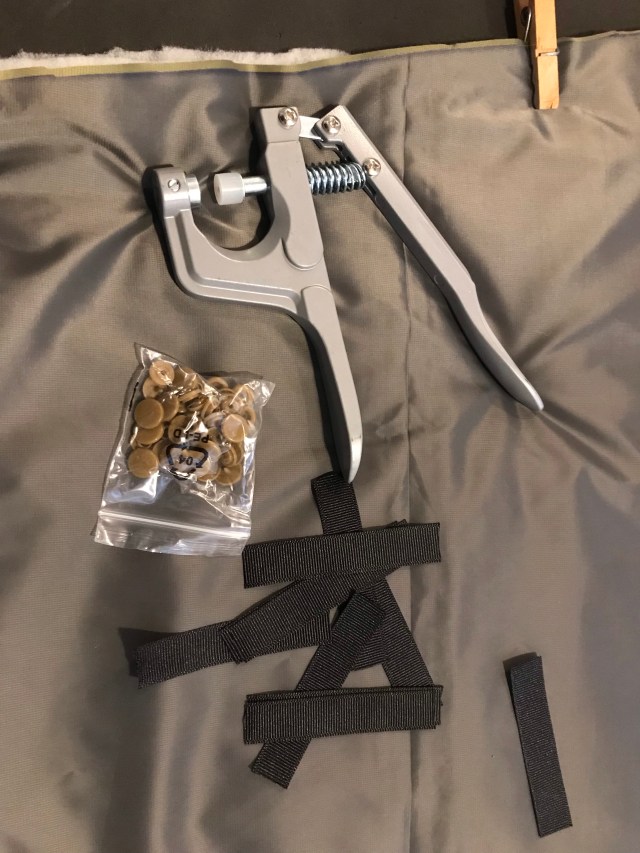
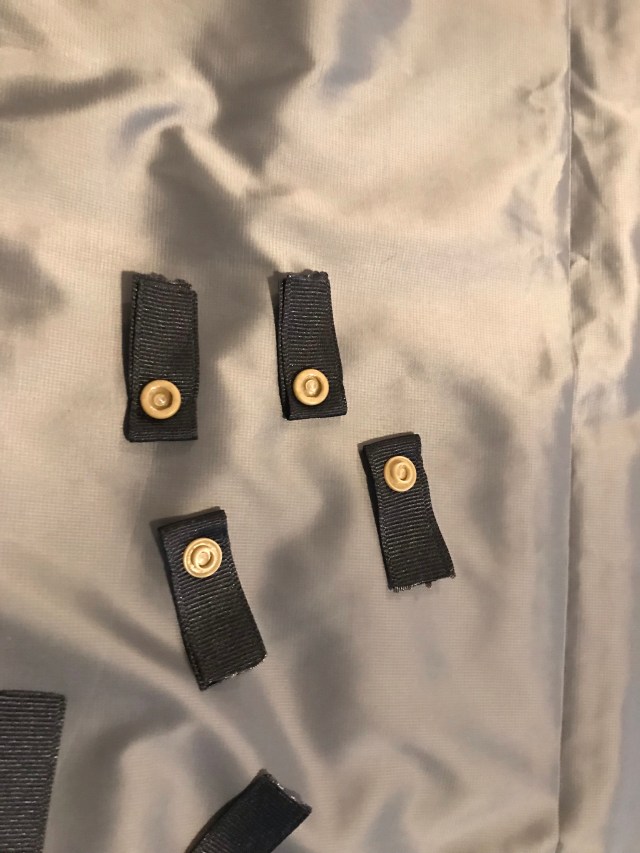
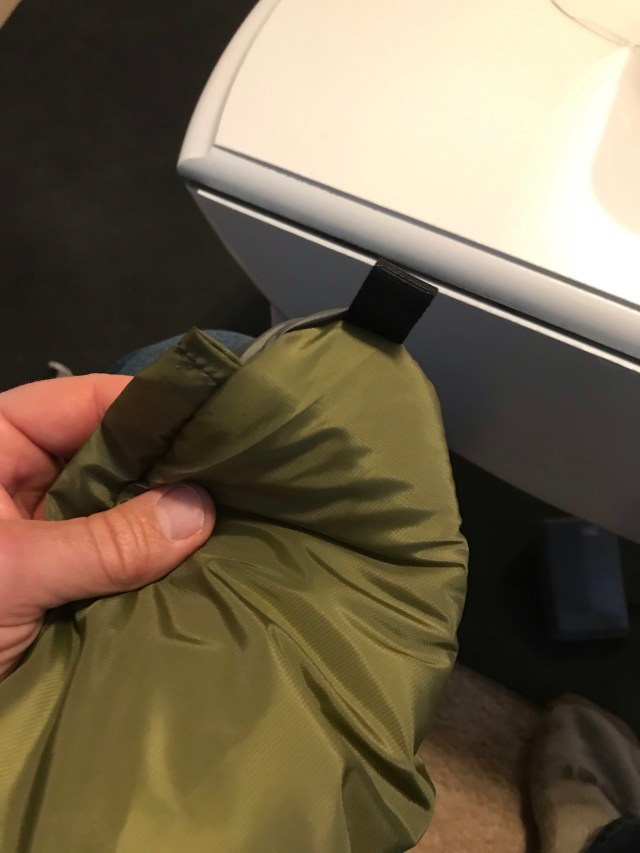
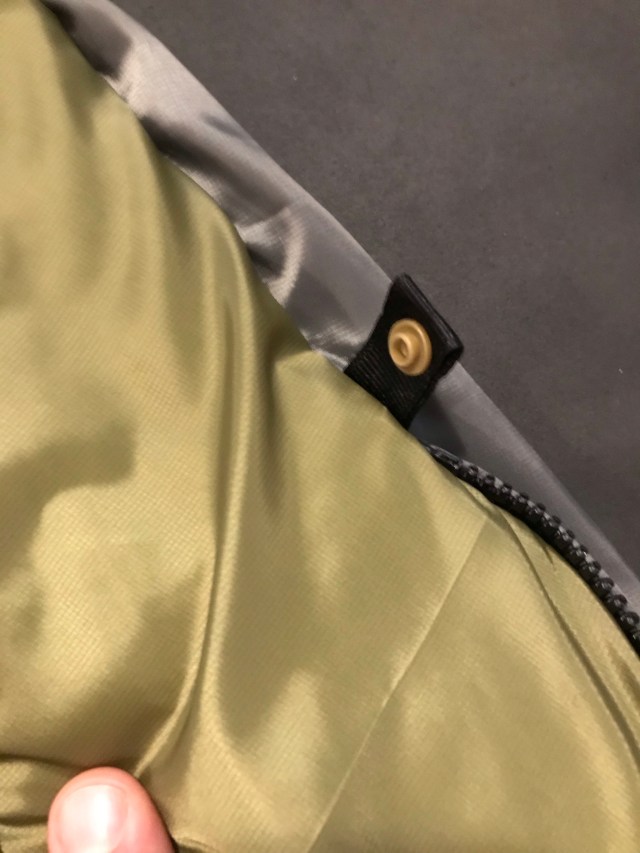
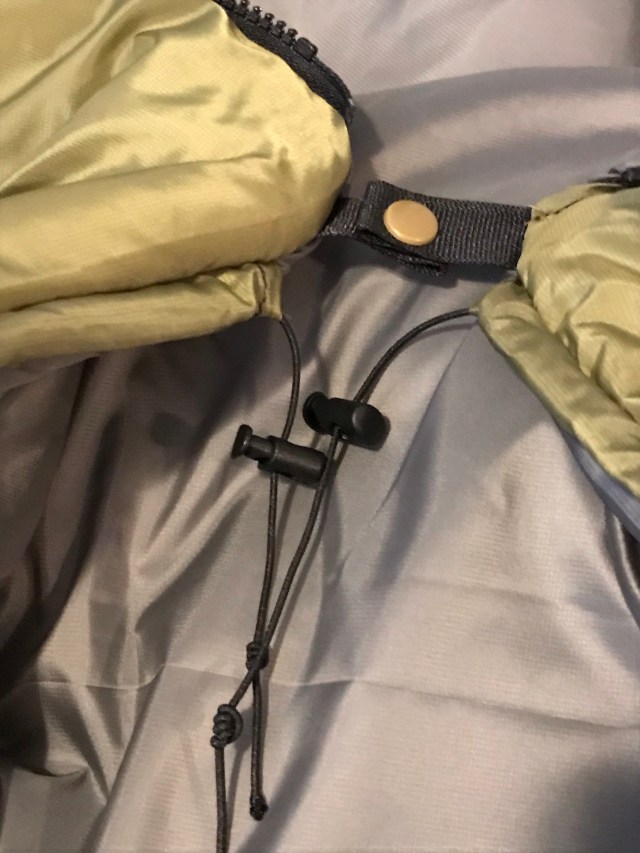
- Remember to pin snaps in place with one up and one down so they mate properly.
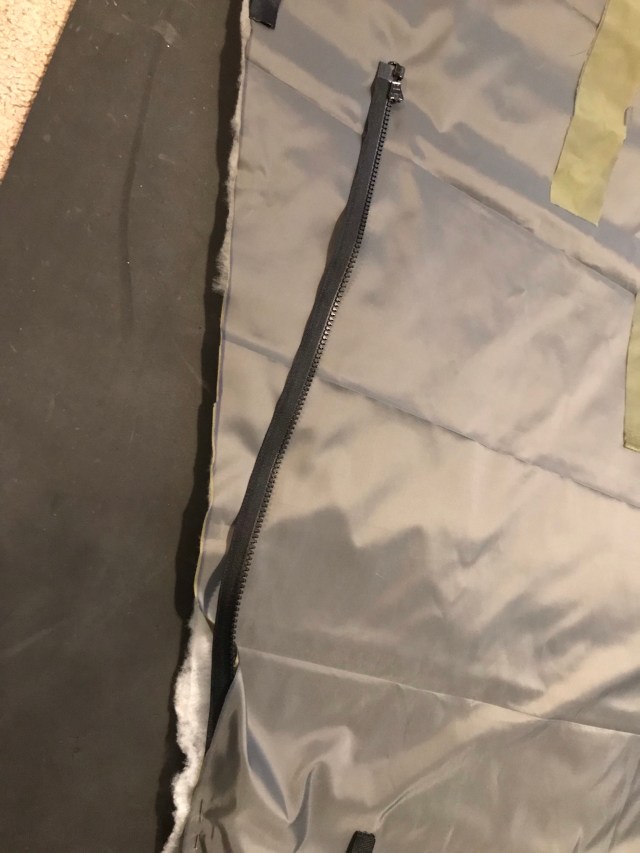
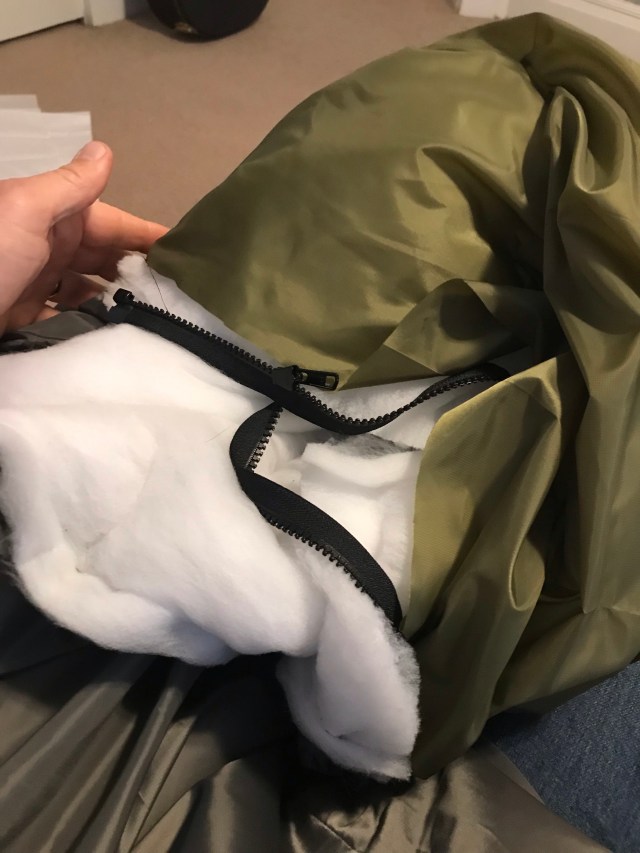
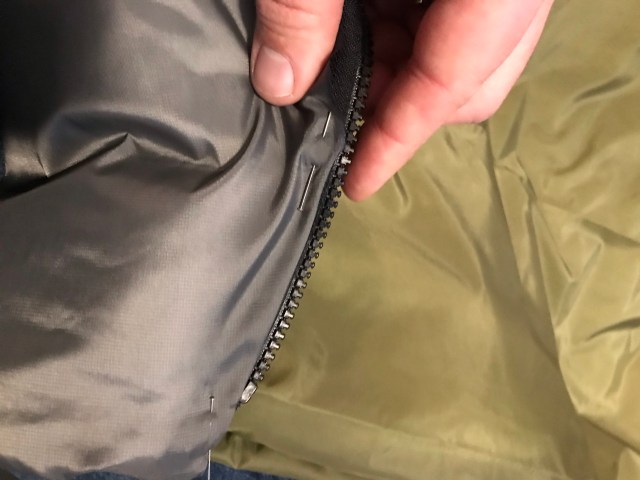
- The top of the zipper should face the shell fabric that you want to be the top of the quilt. Pin the zipper so that it mates at the top and zips toward the bottom of the quilt.
- Carefully check all the the way around the hem for straight pins before you turn the quilt right side out. You don’t want to sew a pin into the inside of the quilt.
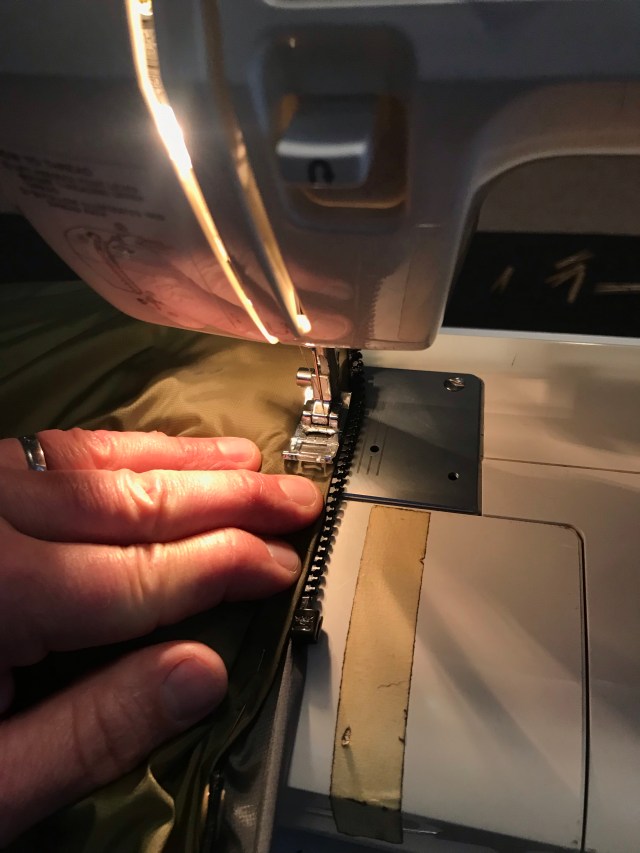
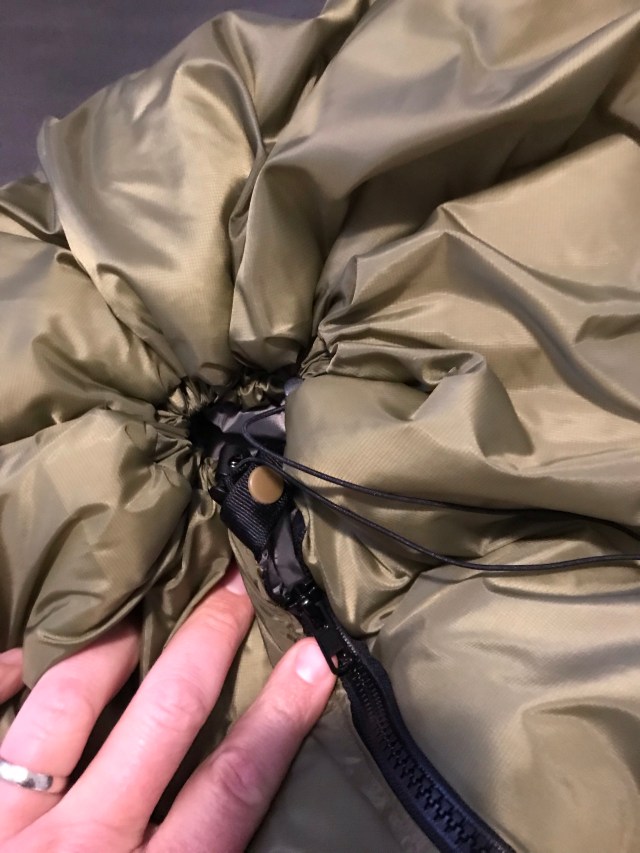
- Next time I’ll sew in the final zipper differently. I’ll fold the top fabric over the Climashield, pin and sew into place. Then pin the zipper in as before. That way the insulation will be secured all the way around the quilt.
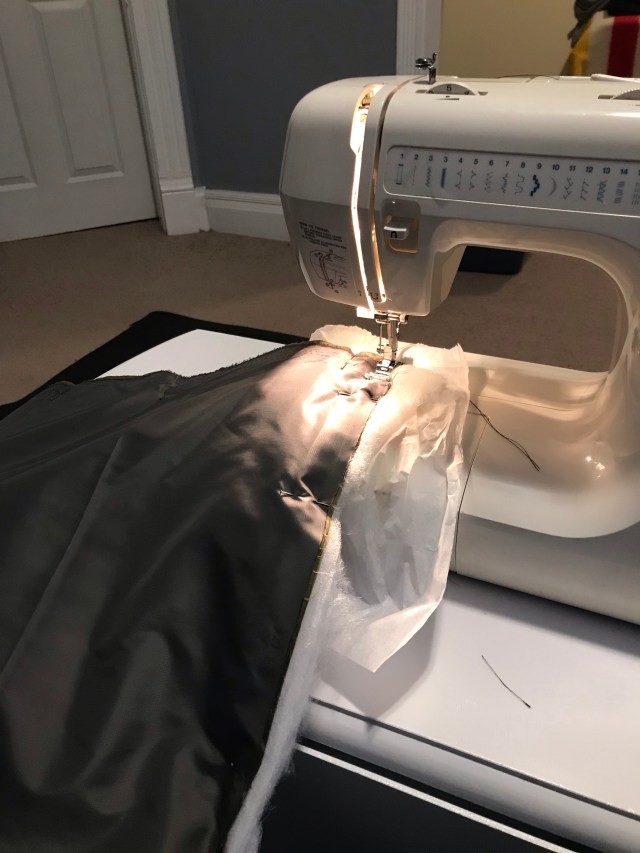
- I didn’t need to use tissue paper to sew this project. That might change if you were using lighter fabric.
Materials List
6 yards 30D ripstop fabric
3 yards 3.6 oz Climashield Apex insulation
24″ YKK #5 separating
30″ 5/8″ grosgrain ribbon
10′ 1/16″ micro shock cord
4 micro cord locks
KAM snaps and tool
Polyester thread
Straight pins
Clothes pins or binder clips
Resources:
https://backcountrybanter.com/how-to-build-a-synthetic-top-quilt-diy-myog/
https://ripstopbytheroll.com/
If you enjoyed this post, please consider subscribing to Kitchi-Gami.com by using one of the links in the menu on the right side of the screen. On your mobile device you’ll find the links if you scroll to the bottom of the page. Thanks!

Great project…!!
Thanks Steve!
Pingback: Kimchi-Gami – DIY: Climashield Apex Backpacking Quilt – Badlands Fieldcraft
Super cool project, Brian. I’ve been thinking about a quilt because it would work super well for us here in the dry southwest. If only we had a suitable sewing machine. Hmmm…
Thanks Mark. A sewing machine is a beautiful thing!
Hej! Well done quilt!
I did a camping blanket with a similar method (all three layers at once) and added draw cords on the short ends on the inside (no visible channel). It can be used as under quilt that way.
I’m working my way on having an under/top quilt-blanket version, with different buttons, slings and cords. Maybe making it possible to stack them with buttons to adjust for seasons.
One thing I learned already: Do all the fiddling with bands (ribbon?), zippers, draw-cords on the two layers of fabric. Check if they fit well and serve the purpose. Turn everything back and than add the climashield by sewing almost 1:1 to the main stitching, a tad more into the left over fabric. I think you get the point.
Yes, going all the way twice sucks. But you can focus 100% on positioning and fixing everything (especially the zippers). The second row of stitching is invisible on the inside, since it’s on the allowance (the fabric you add for stitching?!) anyway. Cut the excess, turn inside out and close the turning-opening.
Regards
Michael
Great tip! Thanks Michael.
This is beautiful, what are the color names?
Hi Dylan,
The fabric I used is:
1.1 oz Ripstop Nylon
Charcoal Gray / Uncalendered
1.1 oz Ripstop Nylon
Olive Drab / Uncalendered
Thanks for the tutorial, you could leave the opening elsewhere instead of the zipper area, I’m leaving mine in the foot box that will be cinched up most of the time anyways.
Good idea. It would be easy to start at the bottom hem, leaving a 6″ gap in the middle that can be closed up at the end. May have to try that the next time around.